Why not grow your own microgreens? Anyone can easily grow microgreens indoors with a few of the readily available supplies around the house. It really takes very little space, time, and resources to grow delicious, nutritious, microgreens that are a healthy source of vitamins, minerals and nutrients, right at home. Microgreens are young seedlings of herbs, grains, beans and veggies that are full of nutrients, despite their small appearance.
Microgreens have always been around us. Traditionally, we’ve been eating and cultivated these plants at mature stages. It wasn’t until 1997 when the word “microgreens” was coined. These seedlings became a popular food in the new millennium, and we are the first generation to harvest these tiny greens in their youth. They are easily grown from seeds and can be harvested within 14 days of germination, when they reach an average height of 1-3 inches. They are very colorful and high in nutritional value.
Nutritional value of microgreens
 When it comes to nutrition, microgreens are far more nutritious compared to their full-size plants. According to studies, researchers found that microgreens such as red cabbage, cilantro, and radish contain up to 40 times higher levels of vital nutrients than their mature counterparts.
“The microgreens were 4-40 times more concentrated with nutrients than their mature counterparts,” says researcher Qin Wang, PhD, assistant professor at the University of Maryland in College Park. (WebMD)
Growing microgreens indoors
 Now we will go into growing our own microgreens indoors. It can be an excellent way to get fresh vegetables and herbs right from your home microgreen garden that can become a refreshing snack, a side dish or a whole nutritious meal all by itself. They are excellent for indoor gardening during the winter or all year round and can be placed conveniently anywhere in your home, such as on your window sill, balcony, or in the kitchen.
Microgreens start growing as sprouts and they keep growing in soil or in a hydroponic system. They put down their roots and grow towards the source of light, as they prepare their food with the help of sunlight, soil (or nutrient additives in a hydroponic system) and water in the process of photosynthesis. Therefore, plenty of light and water are needed for microgreens to grow healthy and tall quickly.
Getting started
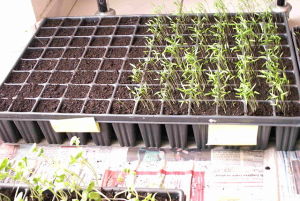
Any plastic container from your food such as small fruit containers, ice cream boxes, packaged salad boxes, and so on, can easily be used to grow microgreens. So, save your food containers instead of throwing them away, and save the lids as well. Fill them up with soil mix. You can buy your ready potting soil mix from a garden supply store or you could prepare your own organic soil for indoor containers. The soil needs to be fluffy and light. You will find tips on useful soil mixes and tips on organic soil mixes on our site or find more potting recipes here at this site: Potting Soil Recipes: Organic Gardening. It also needs to drain most of the water out of the pot, so make sure to make some holes at the bottom of your containers. Stagnant water is the biggest enemy of the microgreens. Using double containers will give them added strength and rigidity.
Sprouting
 Sift your soil with a fine wire mesh sieve and make a layer of fine soil as the top layer for your seeds. Sow your seeds on top of the soil and spray water on them. A spray bottle is perfect because it does not have much pressure. Using the kitchen sink nozzle may wash your seeds away. Cover your seeds with a piece of cardboard cut to fit your container, or with a piece of cloth, then spray water on top of it. This will keep your seeds from becoming too dry. Store your container in a dark place. Be careful not to over water the soil. Cover your container and keep them in a safe place.
Check for signs of life at least once a day. Also check to see if the seeds appear too dry. Sprinkle some water on them if needed. Your sprouts should begin to grown and reach to the lid height within three or four days. At this point take the cloth and covers off.
How you water is very important because stagnant water can cause mold and germs to grow. To avoid stems and leaves catching water, water the soil from below plants and not on the plants so that the stems will not trap water and therefore will not rot or grow mold.
Harvesting
Keep the soil constantly moist, watering twice a day when you have taken the lid and the cloth off of your plants. Pay attention not to over water your soil or mold will rot the stems of your plants. Your plants will be ready for harvest within 7-14 days. Snip them off just above the soil line with a pair of scissors to harvest your microgreens.
Microgreen seeds
 You can use any seed for microgreens that grow in sprouting jars. Several types of beans and grains can be used for this purpose. Use seeds that are not treated with fungicides or pesticides for these chemicals may pose health risks. Always get seeds from dependable and well reputed sources for maximum success. Also, choose a few varieties of seeds at first to get started. Mesclun seed mixes are a good choice for microgreens. Also try varieties like Paris Market Mix and Asian Baby Leaf Mix from Renee’s Garden.
Enjoy your nutritious salads or herbs right from your home microgreen garden that you can place anywhere and grow very easily at home. It just takes a few simple tools and some added attention from your side.
Hope you will be able to grow your own microgreen garden using the tips and techniques mentioned above. Please let us know how well these tips are working for you. We will be posting about microgreens and other types of farming on our site regularly, so please keep reading our blogs and also tell your friends about us.
For more information please click here to book a meeting with us or leave a comment in the comment box below.
Source: Nourish the Planet
Resources:


